How to Personalise your Agenda
Whether you've been planning your agenda for years and you fancy a new tool or have recently been thinking about getting more organised, we have created a solution for you. Let us walk you through how our personalisation service works with our step-by-step guide.
STEP 1 | CHOOSE A REFILL SIZE
Make a start by selecting the size of refill you wish to plan in, choose between personal, A5 or A4 sizes - the decision is yours. If you tend to arrange your schedule from your desk or while on the move, the variety of different sizes will help you create a space that is truly yours wherever you are.
STEP 2 | SELECT YOUR DIARY STYLE
Picking the right style of diary is crucial, this is something you will have to work with and look at all year round. Make the right decision with our selection of styles such as Minimal, Classic or Luxury. While you're here, you also have the option to create a title page for that extra personal touch.
STEP 3 | HAVE FUN PICKING THE RIGHT LAYOUT
Take your planning game to the next level with our wide selection of diary layouts to choose from - whether you prefer to look at your schedule daily or from a glance, we have you covered. Customise even further by adding ruled pages or appointment times.
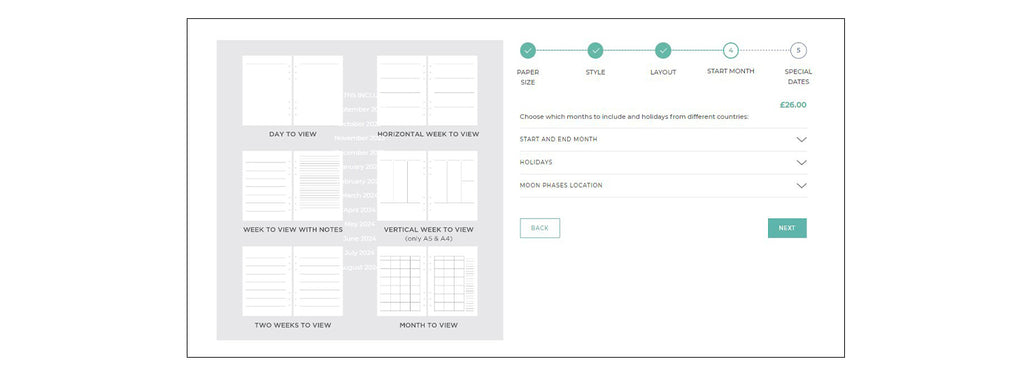
STEP 4 | CHOOSE WHEN TO START THE YEAR
Make it all happen on your terms. This section allows you to pick the month you want to begin your year in, which is great if you're a student or teacher. You can also add any national holidays from a variety of different countries and select religious holidays if desired.
STEP 5 | ADD YOUR OWN SPECIAL DATES
Create the planner of your dreams by entering birthdays of loved ones and prepare for any important anniversaries, weddings or annual trips ahead of time. This feature is also perfect for keeping you accountable with weekly fitness classes or daily meditation, allowing you to repeat any activities by frequency.


 ORGANISERS BY SIZE
 ORGANISERS BY TYPE
 ORGANISERS BY PRICE


